The Irish Sweep is still accepting calls to answer questions and schedule any service needs. However, no on-site visits are currently being conducted pursuant to the government's stay in place order. Please feel free to contact us at 510.521.4088 to get answers to your questions or schedule a future appointment.

WHAT IS PARGING?

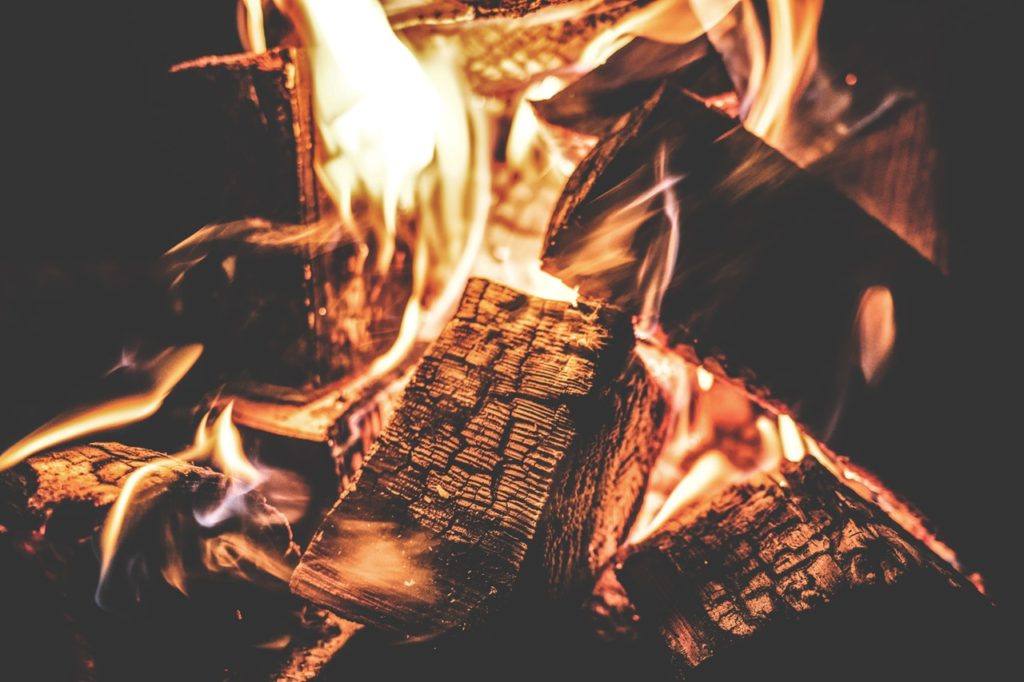
Homes that have chimneys and/or fireplaces are ones with parts that may seem simple but with parts that are unfamiliar. Most only know of these two and maybe the flue and/or damper. However, there are other areas of your chimney that are even more important like the fireplace insert, liner, or even smoke chamber. These are the areas that handle the smoke created by your fires.

As with anything with fire, there is always a danger. Having proper lining and airflow are critical to your safety. If there is buildup, it provide fuel for a potential fire. When the key areas are damaged, parging is required.

THE SMOKE CHAMBER

For instance, this space is shaped like an inverted funnel to direct air up into the flue. It also features a wall that is straight up, and one that is at an angle and a shelf called a “smoke shelf” which prevents the smoke from falling back into the fireplace. The smoke chamber walls should be parged

PARGING

A chimney is generally angled towards a flue to ensure maximum airflow. The surrounding area is then covered in a protective layer to have a smooth coat. This is called parging. By creating this smooth area that goes towards the flue, it creates the ideal flow of air through the chimney system. In addition, it allows the surrounding area to be protected and keep temperatures manageable to protect against a fire hazard.

An annual chimney inspection particularly one using a camera allows a full scale analysis of your fireplace and chimney system to ensure the coating is still there and any other damage that may exist within the area. This is a preventive mechanism to protect against fire hazards and other concerns.

The camera inspections could uncover several things. For instance, if the chimney has cracks or water damage, it would show. If the parging is damaged or non-existent, the camera inspection would show the need to reapply.

At The Irish Sweep, we strongly recommend annual inspections to ensure yours and your family’s safety. If you have questions or have doubts, contact us today.

THE IMPORTANCE OF DRYER VENT CLEANING

Among the top appliances that homeowners rely on to manage a household is the dryer. Don’t let your dryer turn into a fire risk by not cleaning it routinely and appropriately. The lint that builds up is like kindling for a fire. Add the heat of the dryer and a safety hazard exists in every home.

Homeowners often disregard fundamental dryer support until something breaks, but that plan is a fire risk you don’t need. Consistently cleaning the dryer vent is a simple method of reducing laundry expenses, increasing fire safety, and minimizing maintenance while getting better laundry drying results.

Here are some of the reasons to have your dryer vent professionally cleaned on a schedule:

CLOTHING DRYING:

A dryer with a clogging vent will take more time drying clothes. This is because of restricted airflow, which is why it also reduces the effectiveness of your lint trap! You’ll find your clothes are more damp and more linty than if you had dried for the same time with a clear dryer vent system. You can save time waiting for things to dry AND time spend with your lint roller by getting vents cleaned.

EQUIPMENT FAILURE:

Given that you don’t clean your vent routinely, you’re setting a superfluous measure of strain on the dryer. Warmth will eventually slaughter the hardware that power each apparatus available. What’s more, a dryer that is working more diligently than would normally be appropriate will experience parts like course more rapidly. Cleaning the dryer vent routinely can spare you substantial dollars in fixes during the life span of the unit.

UTILITY BILLS:

Moderate evaluations keep up that a normal dryer will use at any rate $0.75 worth of power during a standard drying cycle. A dryer with a messy or obstructed vent can accept twice as long to accomplish worthy outcomes. This implies a common family unit will squander about $100 towards power in a year. Regardless of whether the cushioned service bill doesn’t concern you, the unnecessary carbon emanations should.

UNWANTED GUESTS:

In all honesty, a linty dryer vent is an extraordinary method to pull in an assortment of irritations to your home. Build up garbage in and around the surge pipe are the ideal condition for a number frightening critters. Rodents specifically love to relocate to a comfortable, trash stopped up vent. The moist smaller scale atmosphere encompassing a dryer with a messy vent is a prime area for termites and ants.

FIRE HAZARDS:

As indicated by the National Fire Protection Agency, somewhere in the range of 15,000 to 18,000 structure flames are brought about by grimy dryer vents each year. Build up development alone is a debacle that is constantly building. Notwithstanding something as innocuous as electricity produced via friction can rapidly start a huge blaze under the correct conditions. Exhausted dryers that are near the edge because of stopped up vents can without much of a stretch blow a circuit and begin an electrical flame.

As should be obvious, dryer vent cleaning is indispensably critical to the well being and security of your whole family. Set aside the effort to wipe out your dryer vent and investigate it in any event twice every year. The negligible measure of time you put resources into this will receive rich benefits in adding to the security of your home.

If you have questions or need your vents cleaned, contact the experts at The Irish Sweep.

HOW TO STORE YOUR FIREWOOD OUTDOORS

If you have a fireplace, then you have use for storing firewood. There is something rustic and cozy about having your own woodpile to feed winter fires. But the time to start saving wood is not winter! The time is now, so that your wood can dry and cure before you burn it.

STORING FIREWOOD

Curing happens when wind and sun are allowed to dry out moisture, preventing mildew and mold growth. This also creates ideal conditions for burning.

Whichever storage method you choose, pile your wood in a way that air can move between the logs and dry timber completely. To aid in this, it helps to split wood, but it’s not necessary to debark logs or to split small diameter branches. One of the best ways of piling wood is in alternating directions, so that each layer lies at a 90 degree angle to those above and below it.

There are several effective ways of storing firewood outdoors. However, they’re all designed for the same two key purposes: The primary objective when storing firewood is to keep it dry. Dry firewood is not only easier to burn but it also produces more heat and less creosote and smoke.  The second purpose is to protect the wood from weather that would re-wet it and from critters. Common firewood storage solutions include covers, storage sheds, and firewood storage racks.

WOOD RACKS

Firewood racks are raised log holders especially designed to increase airflow around and under your wood. Because of this, they allow sun and wind to more quickly and easily cure firewood. Since racks create space separating wood from the ground, they also help keep critters from making nests in the wood. However, racks have their limitations. They don’t provide protection against snow and rain. That’s why firewood racks are often used with covers.

WEATHER PROTECTIVE COVERS

The primary benefit of firewood covers is that they protect wood by keeping off wet weather. These waterproof covers aren’t designed for seasoning purposes, because they can restrict air flow. To get the most advantage from a firewood cover (or tarp) cover your woodpile right before rain, hail, or snow, and remove it when adverse weather has passed.

FIREWOOD STORAGE SHEDS

Firewood storage sheds can be both attractive and very functional! The structures can be built with 4, 3, or 2 walls, but always require a roof or overhang to protect wood from weather. If you’re creating a non-enclosed structure, make sure to place walls carefully to protect wood from inclement weather. A wood rack can be extremely useful in conjunction with a shed or structure, to keep protected wood off the ground.

Whatever tools or techniques you choose to utilize, the important focus is to dry your wood and protect it from threats like insects and mold. Be sure to split logs and choose a stacking technique that maximizes air flow, and you’ll do great.

If you have questions on the best way to store firewood, contact The Irish Sweep and talk to our experts.

WHAT HAPPENS WHEN YOU HAVE A CHIMNEY SWEEP INSPECTION

If you’ve never had your chimney inspected, you might be wondering what exactly happens when the inspector comes. Annual inspections and chimney cleanings are recommended for safe fireplace burning. You’ll want to get it done between your last fireplace usage last year and your first fire this winter to ensure that it’s in good working condition.

At your scheduled chimney inspection, your chimney sweep will likely use a special camera to look inside the system, affording them a better view of what’s going on where your fire and smoke travel.

Here’s what they’ll look for:

1.     STRUCTURAL ELEMENTS AND FLUE

The chimney sweep will first look at the exterior and interior of the fireplace and chimney, looking for any problems of wear and tear, including the fireplace, chimney, flue and hearth. These structural elements can affect whether your chimney stays standing after earthquakes or severe weather.

2.     COMBUSTIBLES ARE SECURED

They’ll also look at the structure of the chimney. This is to be sure that combustibles can’t contact any other building materials, which would be a fire hazard. Your fire should stay within a completely secure firebox area. The risk of slow-burning fire within your walls is something to take very seriously.

3.     OBSTRUCTIONS

Your chimney sweep will look for any obstructions. These could possibly block the venting of smoke, combustible byproducts and gas, such as animal nests, leaves and other debris. An obstruction could cause these gasses to build up dangerously inside your home instead of leaving like they should.

4.     VOLUME AND KIND OF COMBUSTIBLE DEPOSITS

A chimney sweep will look at the volume and nature of any combustible deposits building up on the walls of the chimney to see if they pose a danger. Creosote can ignite within your chimney or flue and is highly flammable.

Fireplace Heat Reflector And Firebacks

Did you know that there are products that actually maximize useful heat from gas and wood fires, while reducing the amount of fuel needed to heat your home with fire? Many don’t know about fireplace heat reflector for the fireplace, so they accept the efficiency they’re accustomed to. Yet fireplace heat reflector are a great investment! They not only maximize heat reflected into the home, but they also protect your firebox from any potential heat damage.

If you have a brick and mortar fireplace, it’s susceptible due to the constant cooling and heating from fires. Because of this, fireplaces will crack and shrink over time. Using a fireplace heat reflector or “fireback” will decrease how much heat is absorbed by the back wall of the fireplace, translating to less damage in the long run.

How To Install A Fireplace Heat Reflector

Installing a fireplace heat reflector is fairly easy, and many chimney care companies will do it for you. You’ll want to first measure the back of the wall of the fireplace in inches, and measure the grate where logs rest. A heat reflector is made using a non-combustible metal and features feet that allow it to stand. Measuring your wall will ensure that the grate will either fit in front of or slightly under the reflector.

Once you have the measurements, you know what size heat reflector to get. At home, remove the fire grate and place the reflector at the back of the clean firebox. Do make sure to read the directions that came with the reflector. You’ll want to make sure that the reflector is upright and that it’s stable. When that looks right, replace the fireplace grate and then use your fireplace as normal. You’ll find yourself with a noticeably cozier fire.

Sometimes low tech solutions reap great benefits. If you haven’t invested in a heat reflecting fireback yet, ask us about them at The Irish Sweep.

EASY SPRING CLEANING: 3-DAY PLAN

Spring cleaning is a tradition households follow as winter weather gives way to fresh, warm spring days. This is a natural time for fresh starts, including resetting your annual home needs. And going forward knowing all is in order.

Spring cleaning has its own natural task list, plus many things that you could theoretically do any time. It’s convenient and efficient to lump these spring-time and any-time chores together.

So what are these tasks and what’s the best way to get them done? You can actually get a huge amount of home maintenance accomplished if you approach it with good organization. This 3 day plan can leave you with all your spring chores handled easily in just a few days.

DAY 1- DOING WALKTHROUGHS

Get a notepad and write these headings on the pages: BUY, MAINTENANCE, REPAIR, and REPLACE. As you go, you’ll be making lots of notes here. This can help you stay organized and efficient, so you can save your time and energy for other things.

Walkthrough to find out what’s needed:

INSIDE THE HOUSE

  • Press the “test” button on your smoke and carbon monoxide detectors. Swap out old batteries for fresh ones, if needed. Write down any batteries you need to buy.
  • Check your plumbing for leaks. Include sinks, toilets, and any pipes you can access. Make notes if needed under repair or replace.
  • Turn on all lights as you walk through, list bulb types and number you need under “buy”.
  • Check your walls for dirt and scuffs. Wash walls if needed, or note where you need to repaint.
  • Inspect caulking in the bathroom & kitchen. Also check window seals, and seals on door and window insulation as you go. Make notes if needed under repair and replace.
  • Clean your floors and check for stains and damage. If you need minor repairs, carpet cleaning, or significant floor maintenance, make a note of it.
  • Check your HVAC system and make note of the filter size to buy for replacement.
  • Look at your dryer vent. When was it cleaned last? Have it professionally cleaned if needed.
  • Have you had your chimney swept this year? If not make a note to schedule maintenance.

OUTDOORS

  • Inspect and test your lawnmower, make notes where appropriate if it needs help.
  • Turn on your irrigation system and walk around the grounds to inspect it before the watering season. Move any roots choking it, make notes of any leaking or clogged areas it has.
  • Inspect wooden features like decks and fences to see if they need to be re-sealing or staining, make a note of loose railings and boards to repair.
  • Spray down concrete and look for pools of water on your property. When it rains, are there places where water pools in your grass and soil areas? Look at your driveway, walkways, and patios. Make note if concrete surfaces or drainage need professional help.
  • Visually assess your foundation, siding and roof for repair and maintenance needs. If you can’t see your roof from the ground, make a note to call for a roof inspection.
  • Use a ladder to check your gutters and downspouts for foliage. Make a note under maintenance to clean them if needed.
  • Observe your lawn, landscaping and trees. Make a note of any problems that might need addressing.

DAY 2- GETTING STUFF DONE

This would ideally be a full day off from work. Day two doesn’t literally have to be the day after Day 1. It should be a day that you have time to get your hands dirty.

  • Looking at your to-do lists, add anything you need from the store to the to-buy list
  • Buy items on your list from yesterday: batteries, HVAC filters, etc.
  • Complete the tasks you noted to do today.
  • Give your fireplace surround a thorough scrubbing.
  • Dust your home, from top to bottom. Start with things that are higher up, then mid-level, then lower items.
  • Clean your doors, windows and screens — inside and out. If they need repair or replacement, make a note.
  • Flush your water heater, or make a note under maintenance to hire a pro to perform the work for you. Experts recommend flushing annually.
  • If you have a sump pump, test it by slowly pouring water into the sump pit. The pump should activate and the water should drain. Make a note that you need repair if necessary.
  • Do a lawn mower oil change if it’s been a while, and fill it up with gas if needed.
  • Flip the switches on your ceiling fans to move the fan blades counterclockwise and send air downward. This should help clean dust from the blades. If they need extra dusting, get a step ladder and wipe them with a rag.
  • Inspect your HVAC system and replace your filters. Make a note to hire a professional if you’re due for your annual service or an air duct cleaning.
  • At the end of the day, make note of anything still undone to come back to later.

DAY 3- MAKING PLANS

This should ideally be a work day, so that businesses are open when you call. Look at your calendar and identify times you can schedule maintenance and repairs. This makes it easier when you make calls to schedule services that you identified a need for. Make the calls to schedule services you need.

You can also use today to finish repairs or maintenance that you weren’t able to finish on the second day. There may have just been a high volume of things to get done, or some tasks may have included more steps than you foresaw. Either way, today’s your day to wrap them up.

Using this system of 1) Doing Walkthroughs, 2) Getting Stuff Done, and 3) Making Plans can keep you organized and ensure that all your Spring Cleaning tasks get handled efficiently.

© Copyrights 2025 The Irish Sweep All Rights Reserved.