The Irish Sweep is still accepting calls to answer questions and schedule any service needs. However, no on-site visits are currently being conducted pursuant to the government's stay in place order. Please feel free to contact us at 510.521.4088 to get answers to your questions or schedule a future appointment.

Chimney Waterproofing: Why Spring Is the Perfect Time to Do It

Ah, springtime. The flowers are blooming, the birds are chirping – it’s the perfect time for some spring cleaning! Let’s add chimney maintenance to our spring cleaning tasks alongside clearing out those dusty corners and overflowing closets.

You know the phrase: April showers bring… May chimney disasters?

Okay, it’s not a real proverb. But it highlights the importance of preparing your chimney for spring rain! Cracks, loose bricks, and damaged mortar can all become entry points for water, and wet spring weather can exacerbate these issues. Left unchecked, water intrusion can deteriorate your chimney, cause leaks in your attic, and even lead to structural damage.

Thankfully, there’s a solution: chimney waterproofing. This process creates a protective barrier on the chimney’s exterior, effectively sealing it from the elements. The benefits are numerous, from safeguarding the chimney’s integrity to preventing further damage to your home. This blog will explore why spring is the perfect season to tackle chimney waterproofing, ensuring your chimney is prepped and protected for the years to come.

What is Chimney Waterproofing? 

Chimney waterproofing is the process of applying a sealant to the exterior surfaces of your chimney. This sealant creates a protective barrier that prevents water from penetrating the masonry material, such as brick, stone, or concrete.

If water is allowed to enter your chimney, it can lead to a number of problems, including:

  • Deterioration of mortar and bricks: Water can work its way into cracks, weakening the overall structure.
  • Rusting of flue liners: Water can damage the metal flue liner, which can lead to leaks and potential carbon monoxide issues.
  • Spalling: Water can cause the outer layers of brick or stone to crack and flake off.
  • Leaks in the attic or roof: Water that penetrates the chimney can seep into your attic or roof, leading to moisture damage and potential mold growth.

How Does Chimney Waterproofing Work?

There are two main types of chimney waterproofing materials:

  1. Water repellents: These penetrate the masonry surface and create a water-resistant barrier, allowing moisture vapor to escape while preventing liquid water from entering.
  2. Surface sealants: These form a coating on the surface of the chimney, creating a waterproof barrier.

The application method will vary depending on the chosen material. However, generally, the process involves cleaning the chimney surface, applying the sealant according to the manufacturer’s instructions, and allowing it to cure properly.

Benefits of Waterproofing Your Chimney

By waterproofing your chimney, you can enjoy a number of benefits, including:

  • Extending the lifespan of your chimney: By preventing water damage, waterproofing helps to keep your chimney in good condition for longer.
  • Improving the efficiency of your fireplace: A properly sealed chimney will draw better, leading to a more efficient and enjoyable fire.
  • Reducing the risk of leaks: Waterproofing helps to prevent water from entering your home through the chimney, protecting your attic and roof from damage.
  • Preventing costly repairs: Addressing small cracks and applying waterproofing can prevent the need for more expensive repairs down the road.

Overall, chimney waterproofing is a worthwhile investment that can help to protect your home and ensure the long-term functionality of your fireplace.

Seasonal Challenges for Chimneys

Just like the rest of our homes, chimneys experience a rollercoaster of conditions throughout the year. While it may seem like a sturdy structure, these seasonal changes can take a toll on its health.

Let’s explore how different seasons can affect our chimneys and the specific challenges that arise during winter and summer.

Seasonal Impact on Chimneys:

  • Spring: Spring rains can expose any weaknesses in your chimney’s exterior, allowing water to seep in and wreak havoc. If you live in a very cold area, freeze-thaw cycles from lingering winter chills can further exacerbate existing cracks.
  • Summer: While summer is a time for barbecues and open fires, it’s not exactly peak season for your chimney. However, the intense heat can cause mortar to dry out and crack, creating potential entry points for water later on. Additionally, animal intrusions like birds building nests in the flue can become a concern.
  • Autumn: Autumn brings a return of cooler temperatures and potentially wet weather. Similar to spring, fall rains can exploit any vulnerabilities in your chimney’s waterproofing, making it crucial to ensure proper sealing before the harsh winter arrives.
  • Winter: Winter is your fireplace’s time to shine! Frequent use of your fireplace isn’t a problem if you’re performing regular maintenance, but neglecting maintenance can lead to a number of problems. Moisture from burning unseasoned wood can condense in the flue, creating creosote buildup.

By understanding these seasonal challenges, you can be proactive in maintaining your chimney and ensure its safety and functionality year-round.

The Advantages of Spring Waterproofing

Spring emerges as the ideal time to address chimney waterproofing needs. Here’s why:

  • Favorable Weather Conditions: Spring offers a sweet spot in terms of weather. The harsh chills of winter have subsided, and the scorching heat of summer hasn’t arrived yet. These moderate temperatures create the perfect environment for applying waterproofing materials. They allow the sealant to cure properly without the risk of freezing or extreme evaporation.
  • Enhanced Material Performance: Lower humidity levels, prevalent during springtime, are another advantage. With less moisture in the air, the waterproofing materials can bond more effectively with the chimney surface. This translates to a more durable and long-lasting seal.
  • Scheduling Benefits: Spring is generally considered the off-season for chimney repairs. This translates to potentially shorter wait times for scheduling a professional to waterproof your chimney.

How to Choose the Right Contractor for Chimney Waterproofing

Now that you understand the importance of spring waterproofing and its advantages, it’s time to find the right professional to get the job done.

Here are some key points to consider when choosing a contractor:

Qualifications and Experience

Look for a contractor who is licensed, insured, and certified by a reputable organization like the NCSG (National Chimney Sweep Guild). This ensures they possess the necessary knowledge and skills to handle chimney repairs and waterproofing safely and effectively.

Specific Expertise

While some chimney sweeps offer general maintenance services, it’s crucial to choose a contractor with experience specifically in chimney waterproofing. This ensures they are familiar with the different types of waterproofing materials and application techniques, guaranteeing a long-lasting and effective seal for your chimney.

Ask Questions

Don’t hesitate to ask questions before hiring a contractor. Inquire about their experience with waterproofing projects, the specific materials they use, their warranty policies, and their overall approach to the job. A reputable contractor will be happy to answer your questions and address any concerns you may have.

Here are some specific questions you can ask potential contractors:

  • Can you provide me with references from past clients who have had waterproofing work done?
  • What type of waterproofing material do you recommend for my chimney?
  • What is your warranty on the waterproofing work?
  • What is your process for cleaning up after the job is complete?

By carefully evaluating qualifications, experience, and communication style, you can choose a qualified contractor who will ensure your chimney receives a professional and effective waterproofing treatment.

Maintenance After Waterproofing

While waterproofing provides a robust shield for your chimney, it’s not a set-and-forget solution.

Here are some key practices to maintain your chimney and ensure the waterproofing continues to perform optimally:

  • Regular Check-Ups: Develop a habit of visually inspecting your chimney at least twice a year. Look for any new cracks, signs of spalling (flaking or chipping of the bricks), or white stains (efflorescence) that might indicate moisture problems.
  • Professional Inspection: Schedule a professional chimney inspection at least once a year, preferably before the start of the heating season. A qualified chimney sweep can perform a thorough inspection, identify any potential issues with the waterproofing or other areas of the chimney, and recommend any necessary repairs.
  • Signs of Reapplication: Be mindful of certain signs that might indicate your waterproofing needs to be reapplied. These include recurring cracks, significant water stains on the chimney exterior, or noticeable moisture penetration into your attic or roof.
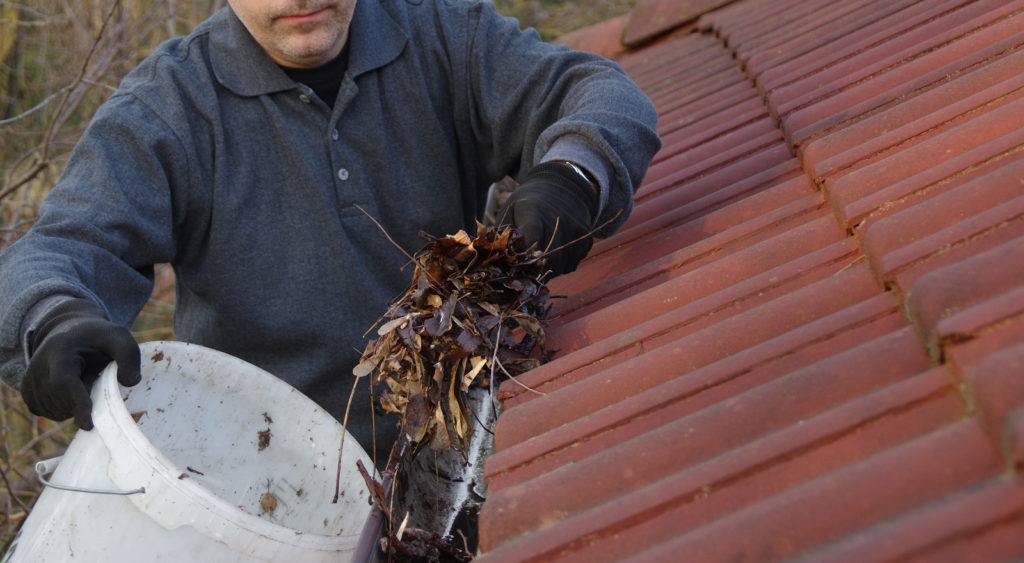
  • Keep the Chimney Cap Clear: A properly functioning chimney cap prevents debris, rain, and animals from entering the flue. Regularly check and clear any leaves, twigs, or other debris from the cap to ensure it functions optimally.
  • Address Minor Issues Promptly: Don’t neglect minor cracks or loose mortar. Addressing them promptly prevents water from seeping in and potentially compromising the waterproofing.
  • Avoid Harsh Cleaning Methods: Harsh chemicals or abrasive cleaning tools can damage the waterproofing sealant. Stick to using mild soap and water for routine cleaning.

By following these simple maintenance practices, you can extend the lifespan of your waterproofing treatment and ensure your chimney remains protected for years to come.

Remember: A well-maintained chimney is a safe and efficient chimney!

Spring into Action and Protect Your Chimney

As we’ve explored, spring is the champion season for tackling chimney waterproofing. Favorable weather conditions, enhanced material performance, and proactive preparation for the rainy season all contribute to a successful waterproofing project.

Don’t wait for potential problems to arise! Schedule an inspection with qualified professionals like The Irish Sweep to assess your chimney’s condition and discuss waterproofing options.

Contact The Irish Sweep today! Our experienced and certified chimney professionals can provide a thorough inspection, discuss the best waterproofing solution for your chimney, and get the job done right. Schedule your appointment soon and enjoy the peace of mind that comes with a well-maintained and waterproof chimney.

Spring Cleaning Essentials: Fireplaces, Wood Stoves, and Dryer Vents

Spring cleaning isn’t just about dusting cobwebs and decluttering closets. It’s a crucial time for home maintenance, ensuring your haven remains safe and efficient throughout the year. As you tackle your spring cleaning to-do list this year, consider focusing on three often-overlooked areas: fireplaces, wood stoves, and dryer vents.

Spring cleaning fireplaces is essential to remove ash buildup and soot, which can hinder performance and even pose a fire hazard. The same goes for wood stoves.  Dryer vents clogged with lint and debris can reduce drying efficiency and become a fire risk.

This comprehensive guide provides valuable insights and practical tips to address these crucial maintenance tasks, ultimately fostering a safer, more comfortable home environment.

Fireplaces – Keeping the Hearth Healthy

The Importance of Annual Fireplace Inspection and Cleaning

Incorporating spring cleaning fireplaces into your annual maintenance routine is not merely good practice; it’s vital for the safety and efficiency of your home.

Regular maintenance helps prevent chimney fires, carbon monoxide poisoning, and can improve the overall efficiency of your fireplace. After a season of use, fireplaces can accumulate creosote, a highly flammable substance formed from burning wood, along with soot and other debris that can obstruct airflow and pose significant fire hazards.

Identifying Common Issues with Fireplaces After Winter Use

After the cold months have passed, it’s common to find a variety of issues with your fireplace and chimney:

  • Soot Buildup: A fine black powder that coats the interior surfaces of your fireplace and chimney, reducing efficiency and air quality.
  • Creosote Accumulation: A tar-like substance that is a byproduct of burning wood. It’s highly combustible and a common cause of chimney fires.
  • Blockages: Birds’ nests, leaves, and other debris can block your chimney, posing a serious fire risk and preventing proper ventilation.
  • Potential Damage: Winter use can lead to cracks in the chimney liner, loose bricks, or deteriorated mortar.

Step-by-Step Guide on Basic Fireplace Cleaning Homeowners Can Do

  • Wait 24 Hours: Ensure your fireplace has cooled down for at least 24 hours since its last use.
  • Preparation: Lay down a tarp or old newspapers in front of the fireplace to catch debris. Wear a dust mask and gloves for protection.
  • Remove Ashes: Carefully scoop out the ashes with a metal shovel and place them in a metal bucket. Dispose of ashes safely, keeping them away from combustible materials.
  • Cleaning the Interior: Use a fireplace brush or a hand broom to scrub the interior walls of the fireplace. A mixture of water and baking soda can help remove soot.
  • Clean the Grate: Remove the grate and brush it down to remove soot and ash.

When to Call in a Professional Chimney Sweep for a Thorough Inspection and Cleaning

While DIY spring cleaning fireplaces can remove superficial debris, a professional chimney sweep is necessary for a comprehensive inspection and cleaning.

Call a professional if you notice:

  • An unusual odor coming from the fireplace.
  • Visible creosote buildup beyond what can be safely removed through DIY methods.
  • Any signs of damage or wear and tear.
  • It’s been more than a year since the last professional inspection.

Professional sweeps have the tools and expertise to safely remove hazardous buildup, check for structural issues, and ensure your chimney complies with safety standards.

Tips for Maintaining a Clean and Efficient Fireplace Until the Next Season

  • Burn Seasoned Wood: Using well-dried, seasoned wood minimizes creosote buildup and ensures a cleaner burn.
  • Use a Chimney Cap: To prevent debris and animals from entering your chimney.
  • Monitor Fire-Burning Practices: Avoid overloading the fireplace and ensure proper ventilation to minimize soot and creosote accumulation.
  • Regular Checks: Periodically check for signs of obstruction or unusual smells, especially after heavy storms or periods of disuse.

By adhering to these guidelines, you can enjoy the warmth and ambiance of your fireplace safely and efficiently, ensuring it remains a cherished part of your home for years to come.

Wood Stoves – Ensuring Efficiency and Safety

Wood stoves provide a cozy, efficient way to heat your home during the cold months. As we transition into spring, it’s crucial to maintain your wood stove to ensure it remains efficient and safe for the next heating season. Spring maintenance is not just about cleaning; it’s about ensuring the longevity and performance of your wood stove.

Common Problems Faced by Wood Stove Users

Wood stove users often encounter several issues that can impact the efficiency and safety of their stoves:

  • Creosote Buildup: A common byproduct of wood burning, creosote is a tar-like substance that can accumulate in the stovepipe and chimney, posing a serious fire hazard.
  • Air Flow Issues: Improper air flow can lead to inefficient burning, resulting in excess smoke and reduced heat output.
  • Wear and Tear: Regular use can cause wear and tear on stove parts, including the door gasket, which may lead to air leaks.

DIY Maintenance Tips for Wood Stove Owners

  • Inspect and Clean the Stovepipe and Chimney: Use a chimney brush to remove soot and creosote buildup from the stovepipe. If you’re comfortable working on the roof, you can also check the chimney, but this is often best left to professionals.
  • Check the Door Gasket: Ensure the door seals tightly. If you can see gaps or feel air leaking, it may be time to replace the gasket.
  • Clean the Interior: Remove ashes and debris from the stove’s interior. A vacuum designed for ash removal can be very helpful for this task.
  • Inspect for Wear and Tear: Check for any signs of wear or damage to the stove and its components. Pay special attention to the firebricks inside the stove; if they’re cracked or damaged, they’ll need to be replaced.

The Importance of Professional Inspections

While DIY maintenance is important, a professional inspection is critical for ensuring the safety and efficiency of your wood stove.

A certified professional can:

  • Thoroughly inspect the chimney and stovepipe for creosote buildup, blockages, or structural issues.
  • Assess the overall condition of the stove and its installation, including the adequacy of ventilation and the integrity of the chimney connections.
  • Provide expert advice on any needed repairs or adjustments to ensure your stove is operating safely and efficiently.

Preparing Your Wood Stove for the Off-Season

  • Thorough Cleaning: After your final use for the season, give your wood stove a thorough cleaning, following the DIY maintenance tips provided.
  • Leave the Damper Open: To allow air circulation and prevent moisture buildup, leave the damper slightly open.
  • Protect Against Rust: To prevent rust, consider applying a light layer of stove oil to the interior surfaces.

By dedicating time to the maintenance of your wood stove in the spring, you can address any issues before they become serious problems, ensuring your stove remains a safe, efficient source of warmth for many years to come.

The Critical Need for Dryer Vent Cleaning

In the routine of home maintenance, dryer vent cleaning might not top the list of priorities, but its importance cannot be overstated. Dryer vents are an essential part of your home’s ecosystem, playing a critical role in the safety and efficiency of your laundry system. Neglecting them can lead to dire consequences.

 spring cleaning fireplaces

The Often-Overlooked Importance of Dryer Vent Cleaning

Dryer vents carry away hot, moist air generated during the drying process. When lint and debris accumulate in these vents, they can obstruct airflow, strain your dryer, and create a significant fire hazard. Surprisingly, thousands of home fires each year are attributed to dryer vents clogged with lint.

The Dangers of Lint Buildup

  • Reduced Efficiency: Clogged vents mean your dryer works harder and longer to dry clothes, significantly increasing energy costs and wear on the machine.
  • Fire Hazards: Lint is highly flammable. Combined with dryers’ high temperatures, significant lint buildup can lead to fires that can quickly engulf a home.

Instructions for Homeowners on How to Clean Lint from Accessible Parts of the Vent

  • Unplug the Dryer: For safety, always unplug the dryer before starting any maintenance work.
  • Clean the Lint Trap: Before and after each load, remove and clean the lint trap thoroughly.
  • Check the Venting System: Detach the duct from the back of the dryer and use a vacuum to remove lint from the duct and the area where it connects to the dryer. If accessible, also clean the external vent.
  • Use a Vent Brush Kit: These kits can help you reach lint further along the vent duct. Carefully insert the brush and gently scrub the sides of the duct, pulling out the lint.

The Benefits of Professional Dryer Vent Cleaning Services

While DIY cleaning is beneficial for routine maintenance, professional cleaning services offer deeper, more thorough cleaning. Professionals have the tools and expertise to:

  • Efficiently remove lint, debris, and blockages from the entire vent system, including difficult parts for homeowners to reach.
  • Inspect the vent system for any signs of damage or wear that could affect its performance and safety.
  • Recommend optimal venting solutions, ensuring your system operates safely and efficiently.

Preventative Measures to Minimize Lint Buildup and Ensure Dryer Efficiency

  • Regular Cleaning: Make lint removal from the trap and vent a regular part of your laundry routine.
  • Monitor Dryer Performance: If clothes take longer to dry or the dryer is running hotter than usual, it may be a sign of vent blockages.
  • Consider Metal Ductwork: If possible, use smooth metal ductwork for your venting system. It’s less prone to lint buildup and more fire-resistant than plastic or foil ducts.

By understanding the critical importance of dryer vent maintenance, homeowners can take proactive steps to mitigate risks and ensure their homes remain safe, efficient, and hazard-free.

As we’ve explored, integrating the care of fireplaces, wood stoves, and dryer vents into your spring cleaning regimen is not just about tidiness; it’s about safeguarding the well-being of your home and loved ones. The accumulation of soot, creosote, and lint poses not only a fire hazard but also diminishes the efficiency of your heating and drying systems. This is where the expertise of professional chimney sweeps and dryer vent cleaners becomes invaluable.

Regular professional inspections and cleanings are imperative to prevent potential hazards and maintain optimal performance of your appliances. As we bid farewell to the cold and welcome the warmth of spring, now is the perfect time to ensure your home is prepared for the year ahead.

Contact The Irish Sweep for your Spring Cleaning Fireplaces Needs

Don’t wait! Contact the Irish Sweep today for a comprehensive inspection and cleaning of your fireplace, wood stove, and dryer vents as part of your spring cleaning fireplaces efforts. Let our team of experts provide you with peace of mind knowing your home is in safe, capable hands.

To schedule an appointment or learn more about our services, reach out to us at 510-521-4088. Ensure your home’s safety and efficiency for the upcoming year—call now!

EASY SPRING CLEANING: 3-DAY PLAN

Spring cleaning is a tradition households follow as winter weather gives way to fresh, warm spring days. This is a natural time for fresh starts, including resetting your annual home needs. And going forward knowing all is in order.

Spring cleaning has its own natural task list, plus many things that you could theoretically do any time. It’s convenient and efficient to lump these spring-time and any-time chores together.

So what are these tasks and what’s the best way to get them done? You can actually get a huge amount of home maintenance accomplished if you approach it with good organization. This 3 day plan can leave you with all your spring chores handled easily in just a few days.

DAY 1- DOING WALKTHROUGHS

Get a notepad and write these headings on the pages: BUY, MAINTENANCE, REPAIR, and REPLACE. As you go, you’ll be making lots of notes here. This can help you stay organized and efficient, so you can save your time and energy for other things.

Walkthrough to find out what’s needed:

INSIDE THE HOUSE

  • Press the “test” button on your smoke and carbon monoxide detectors. Swap out old batteries for fresh ones, if needed. Write down any batteries you need to buy.
  • Check your plumbing for leaks. Include sinks, toilets, and any pipes you can access. Make notes if needed under repair or replace.
  • Turn on all lights as you walk through, list bulb types and number you need under “buy”.
  • Check your walls for dirt and scuffs. Wash walls if needed, or note where you need to repaint.
  • Inspect caulking in the bathroom & kitchen. Also check window seals, and seals on door and window insulation as you go. Make notes if needed under repair and replace.
  • Clean your floors and check for stains and damage. If you need minor repairs, carpet cleaning, or significant floor maintenance, make a note of it.
  • Check your HVAC system and make note of the filter size to buy for replacement.
  • Look at your dryer vent. When was it cleaned last? Have it professionally cleaned if needed.
  • Have you had your chimney swept this year? If not make a note to schedule maintenance.

OUTDOORS

  • Inspect and test your lawnmower, make notes where appropriate if it needs help.
  • Turn on your irrigation system and walk around the grounds to inspect it before the watering season. Move any roots choking it, make notes of any leaking or clogged areas it has.
  • Inspect wooden features like decks and fences to see if they need to be re-sealing or staining, make a note of loose railings and boards to repair.
  • Spray down concrete and look for pools of water on your property. When it rains, are there places where water pools in your grass and soil areas? Look at your driveway, walkways, and patios. Make note if concrete surfaces or drainage need professional help.
  • Visually assess your foundation, siding and roof for repair and maintenance needs. If you can’t see your roof from the ground, make a note to call for a roof inspection.
  • Use a ladder to check your gutters and downspouts for foliage. Make a note under maintenance to clean them if needed.
  • Observe your lawn, landscaping and trees. Make a note of any problems that might need addressing.

DAY 2- GETTING STUFF DONE

This would ideally be a full day off from work. Day two doesn’t literally have to be the day after Day 1. It should be a day that you have time to get your hands dirty.

  • Looking at your to-do lists, add anything you need from the store to the to-buy list
  • Buy items on your list from yesterday: batteries, HVAC filters, etc.
  • Complete the tasks you noted to do today.
  • Give your fireplace surround a thorough scrubbing.
  • Dust your home, from top to bottom. Start with things that are higher up, then mid-level, then lower items.
  • Clean your doors, windows and screens — inside and out. If they need repair or replacement, make a note.
  • Flush your water heater, or make a note under maintenance to hire a pro to perform the work for you. Experts recommend flushing annually.
  • If you have a sump pump, test it by slowly pouring water into the sump pit. The pump should activate and the water should drain. Make a note that you need repair if necessary.
  • Do a lawn mower oil change if it’s been a while, and fill it up with gas if needed.
  • Flip the switches on your ceiling fans to move the fan blades counterclockwise and send air downward. This should help clean dust from the blades. If they need extra dusting, get a step ladder and wipe them with a rag.
  • Inspect your HVAC system and replace your filters. Make a note to hire a professional if you’re due for your annual service or an air duct cleaning.
  • At the end of the day, make note of anything still undone to come back to later.

DAY 3- MAKING PLANS

This should ideally be a work day, so that businesses are open when you call. Look at your calendar and identify times you can schedule maintenance and repairs. This makes it easier when you make calls to schedule services that you identified a need for. Make the calls to schedule services you need.

You can also use today to finish repairs or maintenance that you weren’t able to finish on the second day. There may have just been a high volume of things to get done, or some tasks may have included more steps than you foresaw. Either way, today’s your day to wrap them up.

Using this system of 1) Doing Walkthroughs, 2) Getting Stuff Done, and 3) Making Plans can keep you organized and ensure that all your Spring Cleaning tasks get handled efficiently.

© Copyrights 2025 The Irish Sweep All Rights Reserved.