If you’re considering upgrading your wood-burning fireplace with a gas fireplace insert, you’re not alone. Many homeowners love the convenience, efficiency, and cleaner burn that gas appliances provide. However, before you proceed with the installation, it’s crucial to schedule a professional chimney inspection and sweep. Ignoring this step could lead to serious safety hazards, costly repairs, and even risks to your home and health.
In this guide, we’ll explain why a chimney inspection and sweep are essential before installing any gas appliance and how they ensure a safe and efficient fireplace upgrade.
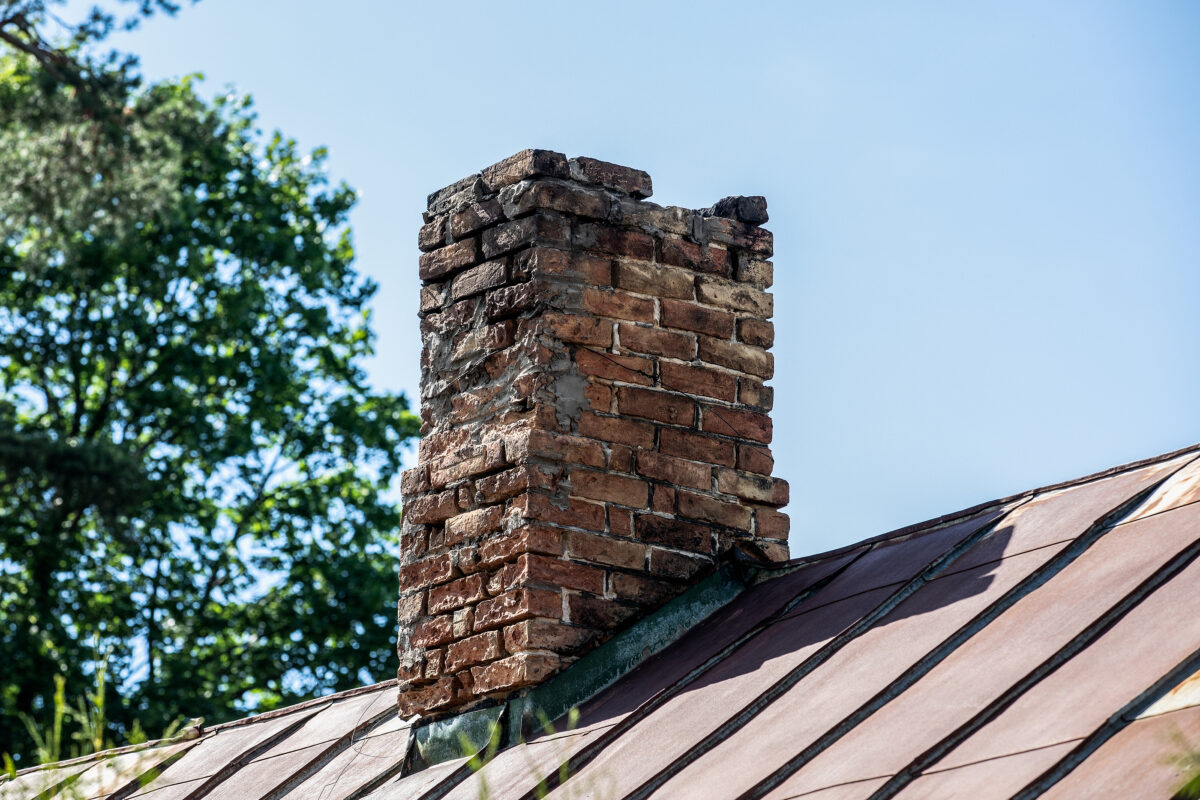
The Hidden Dangers in Your Chimney
A gas fireplace insert may not produce the same creosote buildup as a wood-burning fire, but that doesn’t mean your chimney is automatically safe. Over time, chimneys can develop blockages, structural damage, and hidden defects that could become dangerous when introducing a gas appliance. Here’s why an inspection and sweep are non-negotiable:
- Removing Creosote and Debris
If you’ve been using your fireplace to burn wood, chances are there’s a layer of creosote buildup inside the chimney. This highly flammable residue must be removed before installing a gas fireplace insert. Even though gas doesn’t produce creosote, old deposits can still pose a fire risk.
Additionally, bird nests, leaves, and other debris could be blocking the flue, preventing proper venting. A sweep ensures that the chimney is clear and ready for safe operation.
- Checking for Structural Damage
Over time, chimneys develop cracks, deteriorating mortar, or damaged flue liners. These structural issues can lead to carbon monoxide leaks, poor draft, and even chimney collapse in extreme cases. A thorough inspection will identify and address any weaknesses before installing a gas fireplace insert.
- Ensuring Proper Venting
Gas appliances produce carbon monoxide (CO), an odorless, deadly gas. Unlike wood-burning fireplaces that rely on natural draft, gas fireplace inserts require specific venting conditions to operate safely. If the chimney is blocked, damaged, or improperly lined, carbon monoxide could seep into your home.
A Level 2 chimney inspection will confirm that your chimney can handle the venting needs of a gas fireplace insert, ensuring safe combustion and exhaust.

Gas Fireplace Inserts Require a Different Chimney Setup
When switching from wood to gas, your existing chimney may not be properly designed for a gas fireplace insert. Gas appliances often vent through two aluminum liners to improve efficiency and prevent condensation buildup, which can deteriorate masonry chimneys over time.
A certified chimney sweep will inspect your system to ensure the chimney is in good condition for the installation. The, venting components must be installed according to the gas insert manufacturer’s specifications.
Preventing Carbon Monoxide Poisoning
A malfunctioning or improperly vented gas fireplace insert can introduce carbon monoxide into your home. This is why regular chimney inspections are essential—not just before installation but as part of ongoing maintenance.
During an inspection, professionals will check for:
- Blockages that could trap exhaust gases
- Proper draft and ventilation
- Cracks or leaks that could allow CO to enter your living space
For added safety, always install carbon monoxide detectors near your fireplace and sleeping areas.
Meeting Local Codes and Manufacturer Requirements
Most cities and counties require a chimney inspection before installing a gas fireplace insert. Additionally, many manufacturers void warranties if the appliance is installed in a chimney that hasn’t been properly inspected and swept.
By scheduling a professional chimney service, you ensure that your installation meets safety codes and manufacturer guidelines, protecting your investment and your home.
How to Choose a Qualified Chimney Professional for Your Inspection
Not all chimney sweeps and inspectors are equally qualified to prepare your fireplace for a gas fireplace insert. Choosing the right professional ensures a thorough, reliable inspection that meets safety standards.
Here’s what to look for:
- Certifications and Training – Look for a professional certified by the National Chimney Sweep Guild (NCSG). These credentials indicate proper training and adherence to safety protocols.
- Experience with Gas Fireplace Conversions – Not all chimney services specialize in gas fireplace inserts. Make sure your chosen professional has experience evaluating and modifying chimneys for gas appliances.
- Inspection Capability – A chimney inspection is required when making changes to a fireplace system, such as installing a gas fireplace insert. Ensure your inspector offers this advanced inspection, which includes video scanning of the flue.
- Reputation and Reviews – Check customer reviews and testimonials to confirm the company’s reliability, professionalism, and quality of service.
- Clear, Detailed Reports – A trustworthy chimney inspector will provide a written report with photos, outlining any necessary repairs or modifications before installation.
By selecting a qualified chimney professional, you can confidently move forward with your gas fireplace insert installation, knowing your home is safe and compliant with all regulations.
The Cost of Skipping a Chimney Inspection
Failing to inspect and sweep your chimney before installing a gas fireplace insert can lead to:
- Increased risk of house fires
- Dangerous carbon monoxide leaks
- Expensive structural repairs later on
- Inefficient fireplace operation, leading to higher energy bills
A small investment in a professional chimney inspection and sweep can save you thousands of dollars in future repairs and, more importantly, protect your family’s safety.
Ready to Install a Gas Fireplace Insert? Schedule an Inspection Today!
Before you install a gas fireplace insert, make sure your chimney is safe, clean, and ready for the upgrade. A professional chimney inspection and sweep will ensure proper venting, prevent hazards, and give you peace of mind.
At The Irish Sweep, we specialize in thorough chimney inspections and cleanings to prepare your fireplace for a seamless gas insert installation. Contact us today to schedule your chimney service and make your home safer and more efficient!